
What you will get
A plan ready to be picked on an enrolment. The path is Contracts › Financial Plans and the New Financial Plan button.
Two things are required: the Name and at least one payment method. The rest of the form only appears as you tick the methods.
Step by step
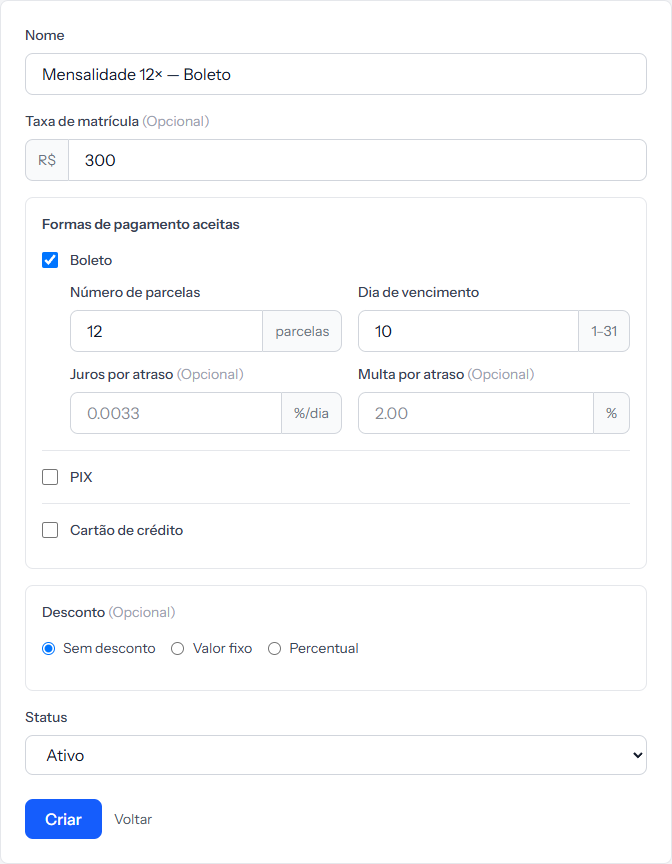 The instalment and due-day fields only appear once you tick the payment method. The two at the bottom — Juros por atraso and Multa por atraso, late interest and late fee — are out of this article; the reason is at the end.
1. Give it a name that describes the condition, not the course. The plan gets reused, so 12× monthly — bank slip ages well; Secondary school plan does not.
2. Fill in the Enrollment fee if your school charges one. It is a separate amount, charged once at the start — the article next door explains how it shows up later.
Leave it blank if there is none.
3. Tick the accepted payment methods. Each one you tick opens its own fields just below:
| Method | What it opens |
|---|---|
| Bank slip | Number of instalments, due day, late interest, late fee |
| PIX | The same four fields |
| Credit card | Max instalments, interest-free instalments, retry days |
You can tick more than one. Tick all three and the buyer chooses at purchase.
4. Leave the Status as Active and click Create.
What to do with the Discount block
Leave it on No discount. The discount fields exist on the form, but what you store there is not applied to any charge — I checked by creating a plan with a 10% discount and enrolling a student: the instalments came out at full price.
Until that changes, discounts are applied on the enrolment, by typing the already-reduced amount into the value field.
The two late fields
Late interest rate and Late fee are deliberately out of this article. The calculation they feed does not match what the screen's own labels promise, and the matter is under review.
Until it is settled: leave both blank and, when you issue a second copy, check the proposed amount against your contract's rule before saving.
How you know it worked
The green banner says Financial plan created successfully. and the plan joins the list, with the middle columns summarising what it accepts — 12x dia 10 under Boleto, for example.
If something goes wrong
The message says "Select at least one payment method." None of the three boxes was ticked. A plan with no payment method would have no way to charge.
You unticked a method and its fields vanished. They are erased along with it. Tick it again and the fields come back blank.
The due day will not take 32. The field runs from 1 to 31.
You cannot see the create button. Financial plans belong to whoever administers the account.
Reviewed on · view as plain text