
What you will get
A precise picture of what happens when a student accepts the contract online — and the ability to produce that proof when somebody asks for it.
What the student sees
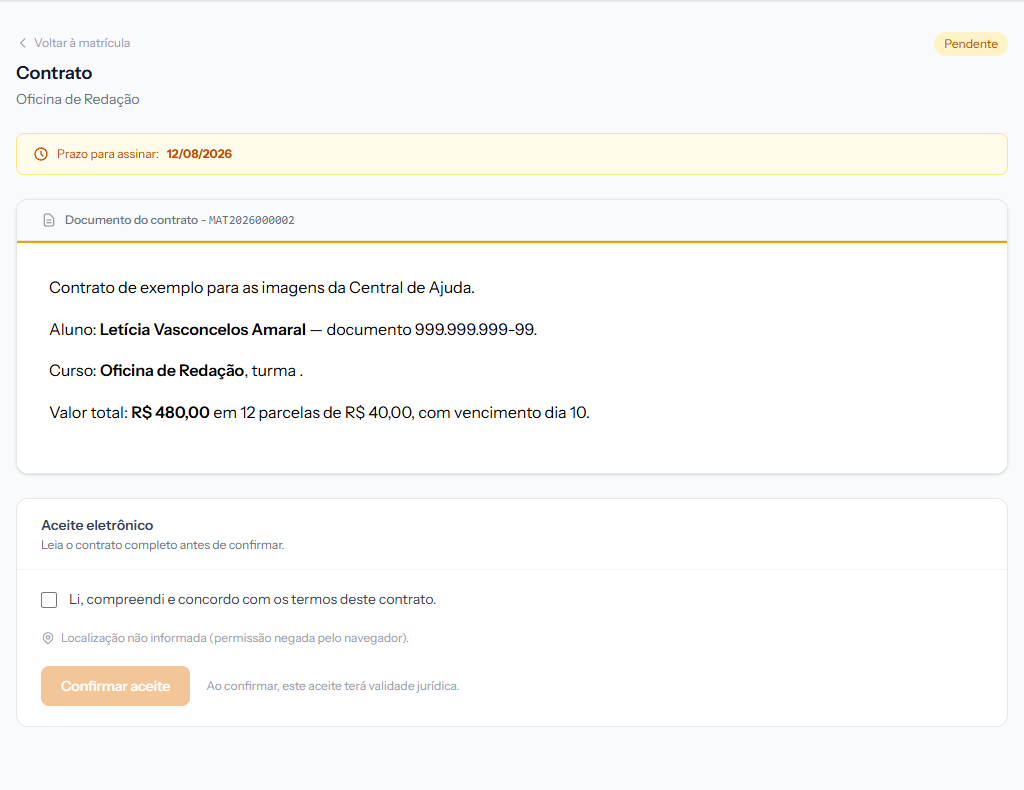 The Confirm acceptance button only lights up once the box is ticked. The amber strip at the top shows the deadline. The screenshot is from the Portuguese portal; the layout is the same in English.
The student signs in to the portal, opens the enrolment and clicks Read and sign contract. The screen shows, top to bottom:
1. The deadline, in the amber strip — Sign by, with the date.
2. The whole document, exactly as it came out after the variables were replaced with the enrolment's real data.
3. The Electronic acceptance panel, with the box I have read, understood and agree to the terms of this contract. and the Confirm acceptance button.
The button stays dim until the box is ticked. Tick it and the button lights up.
What gets recorded
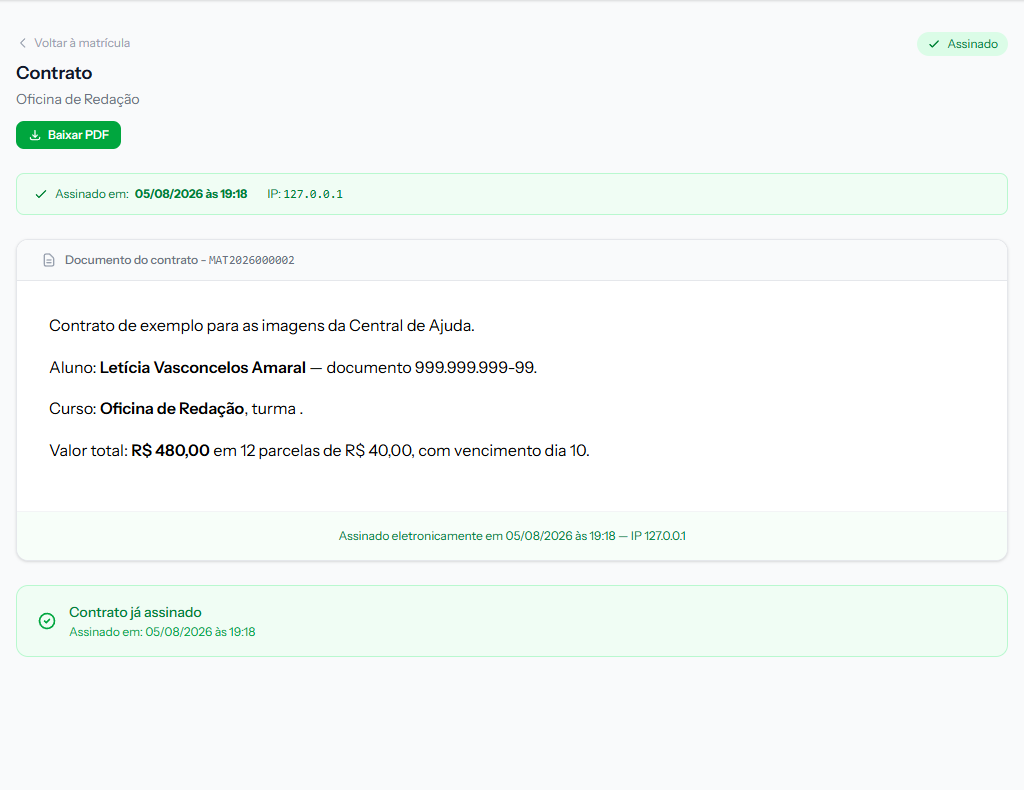 The same information appears three times: in the top strip, in the document footer and in the green panel at the end. That is deliberate — the PDF carries the footer with it.
At the moment of the click, the system stores:
- The exact date and time.
- The IP address the acceptance came from.
- The device and browser used.
- The location, if the student allows it in the browser. If they refuse, the screen says: Location not provided (permission denied by browser). The acceptance is valid either way.
- The contract text, frozen. From then on, editing the template does not change what was accepted.
Where the school finds that proof
Open the enrolment in the panel and go to Contract Audit, next to Contract Summary.
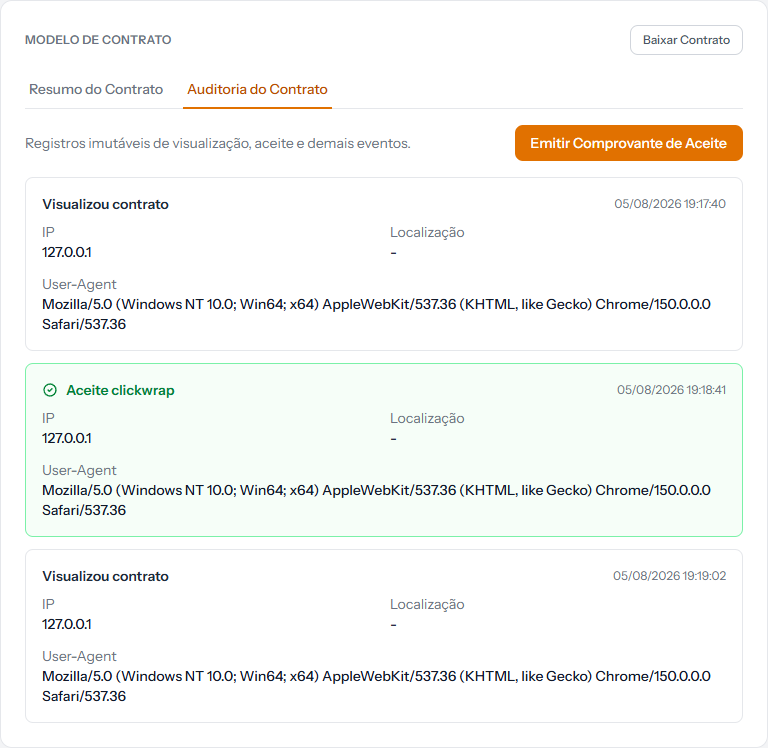 The green event with the tick is the acceptance. The grey ones are the times the student opened the contract — including after signing.
Each row carries the event, the date down to the second, the IP address and the device. Every opening of the contract becomes a row, which is usually useful: it shows the document was in front of the student before acceptance.
The Issue Acceptance Receipt button, at the top of that tab, produces the document that gathers all of this into a single PDF — that is what you send to whoever asked for proof.
The row is labelled
Clickwrap acceptance. That is the technical name for the tick-box method; read it as "electronic acceptance". Logged for correction.
What happens to the enrolment
As soon as the acceptance lands, the enrolment leaves Awaiting contract and moves to:
- Awaiting payment, if there is an open instalment — which is the normal case.
- Active, if there is none.
The student gets no confirmation email on this path. They see the change on screen, and that is all. Logged for correction.
How you know it worked
The contract label changes to Signed, the Download PDF button appears, and the green strip reads Signed on: with the date, time and IP address.
If something goes wrong
The Confirm acceptance button will not light up. The box is not ticked. That is the only condition.
The student says they accepted and the screen shows Pending. Check they were on the right enrolment — a student with more than one enrolment has one contract for each.
The contract will not open for signing. See the diagnosis article; it is almost always portal access or an expired deadline.
Reviewed on · view as plain text