
What you will get
A school ready to charge. Until this connection exists, no charge goes out — by hand or on its own.
It is the last piece of the initial setup, and the only one that depends on a service outside EduPay.
Before you start
- Only whoever administers the EduPay account can do this. If the button does not appear for you, your account is a team account.
- You need a Stripe account. If you do not have one yet, you can create it along the way — the companion article explains what will be asked.
- Have the school's details at hand: tax ID, address and the bank account where the money should land.
Step by step
1. Open Integrations › Payment Gateway in the side menu.
2. Check that it says Not configured. The badge sits on the right of the STRIPE CONNECT box. If it already says Connected, someone at the school has done this and you do not need to redo it.
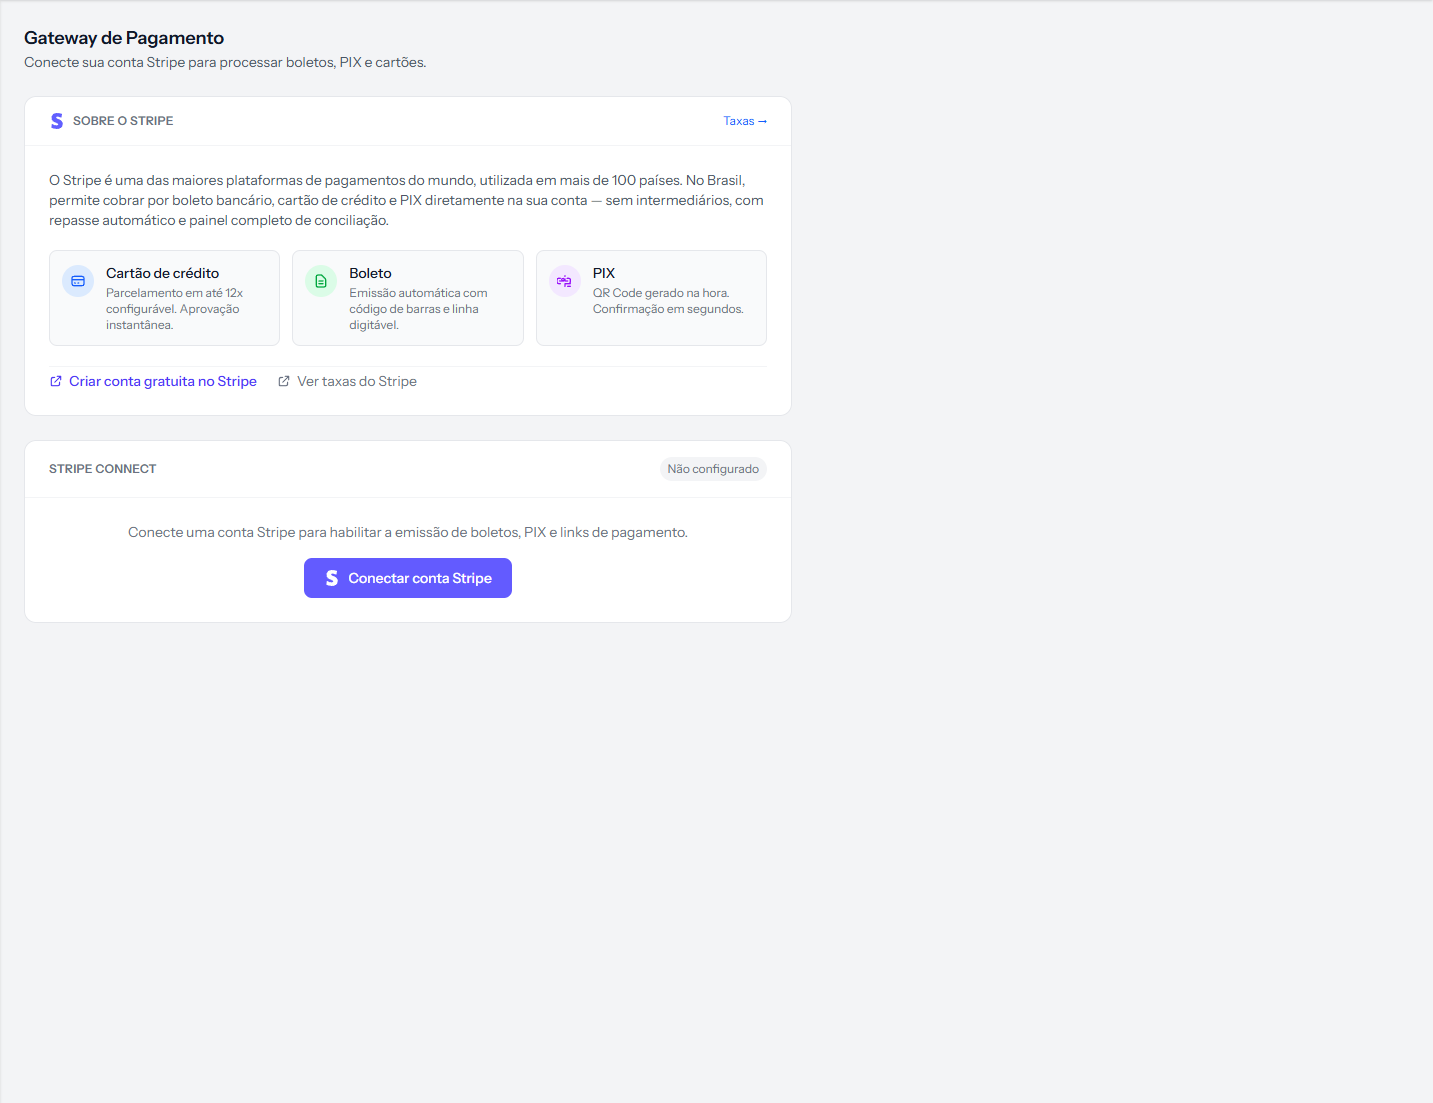 Before the connection the screen is short: the explanation, the three payment methods and a single button. The "Create a free Stripe account" and "View Stripe fees" links disappear once you connect.
3. Click Connect Stripe account. You leave EduPay and go to Stripe's own screen.
4. Sign in to your Stripe account and pick which account to connect. If you administer more than one, choose carefully: the account picked here is the one that will receive your students' money.
5. Confirm the authorisation. Stripe sends you back to EduPay, and the screen reloads with the connection already made.
How to know it worked
The message "Conta Stripe conectada com sucesso." appears at the top, the badge changes to Connected, and the box starts showing the Account ID, the date under Connected at, the Connection mode and the Accepted payment methods.
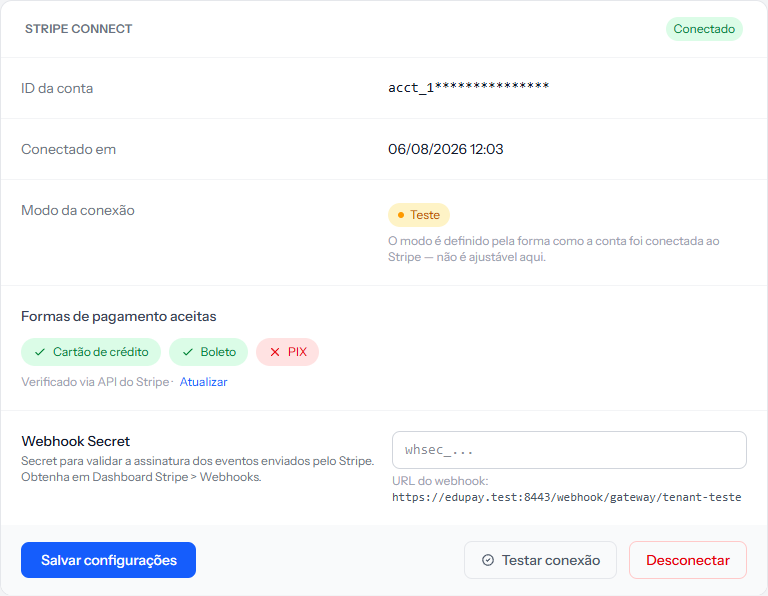 The account ID appears mostly hidden, on purpose. And look at the methods box: here card and boleto are enabled and PIX is not — every account has its own situation.
Before calling it done, click Test connection. The "Connected" badge only says a connection is on record; the test is what confirms it responds.
Test mode and Production mode
Just below the date comes the Connection mode, with one of two badges:
- Production — real charges, real money.
- Test — nothing is charged to the student; useful for trying the path before opening it to your classes.
You do not choose this here. The mode comes from how the account was connected on Stripe's side, and the screen says so: "The mode is determined by how the account was connected to Stripe — it cannot be changed here."
If the badge says Test and you are already charging real students, disconnect and redo the connection from Stripe's production area.
If something goes wrong
"Estado inválido. Tente conectar novamente." The round trip took too long, or the path was opened in two tabs. Click connect again and finish without stopping halfway.
"Código de autorização não recebido." You came back from Stripe without confirming the authorisation — usually by closing the window or clicking back. Redo it.
"Erro ao conectar com o Stripe", followed by English text. The original refusal message comes along. The most common case is the chosen account not belonging to the same environment as the authorisation — if that happens, keep the text and contact support, because the information is all in there.
The Connect Stripe account button does not appear. Your account is a team account. Ask whoever administers the EduPay account.
Reviewed on · view as plain text